How to use Zoom as Virtual Roundtable Platform
Table of Contents
Virtual roundtable discussions are great when it comes to decision-maker level lead generation. They are quite easy to set up and the good news is that you probably already have the right virtual roundtable platform, namely: Zoom.
Zoom is a video conferencing platform that’s used by many companies across the world. It’s been reported that Zoom has a market share of 42.8% in America in 2020.
I've hosted many virtual roundtable discussions in the IT market through Zoom and they generate high-quality leads that convert fast.
So, in this guide, I will walk you through the step-by-step process to set up your own virtual roundtable discussions through Zoom.
Why does Zoom work as a virtual roundtable platform?
First of all, you need to understand why Zoom works well as a virtual roundtable platform.
The ideal audience size of a roundtable discussion is between 8 and 10 external people.
(Markletic, 2020)
With a group this small, you have the possibility to improve engagement by enabling video. In a virtual environment, it’s critical that you have the ability to see each other. This way, you can build better relationships with your audience.
Zoom also gives you the ability to create breakout rooms. So let’s say you want to split to group into half, then this is possible. If you have 10 people in a group, it’s difficult to give everyone an opportunity to speak. So by halving the group, you give the audience the possibility to participate and get more value out of the event.
How to set-up Zoom as your virtual roundtable platform
Read the step-by-step guide below or watch the video.
With Zoom you have the possibility to create meetings and webinars. For a virtual roundtable discussion, you will be using the meeting functionality.
The reason is that the goal of a virtual roundtable discussion is that people can talk and that they can see each other. With a webinar format, this is more difficult to achieve.
So, log into Zoom and I’ll walk you through all the steps so that you can use Zoom as your virtual roundtable platform.
Set up time: 5 minutes
1. Click on “Schedule a New Meeting.
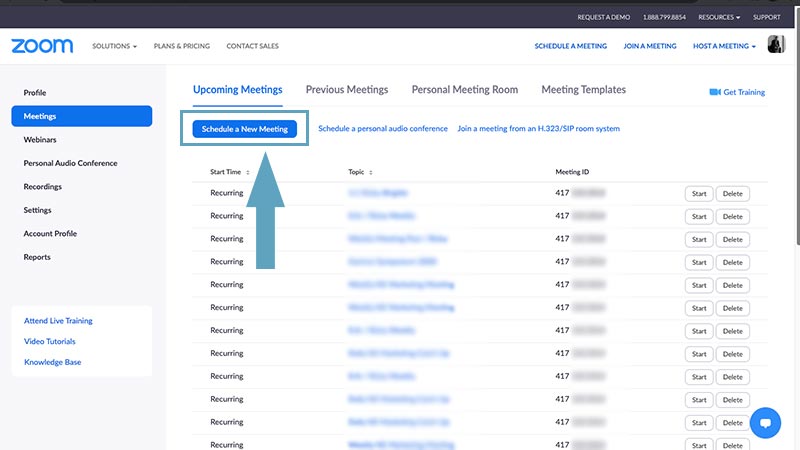
This will create a new event.
2. Enter a title and a description of your virtual roundtable discussion
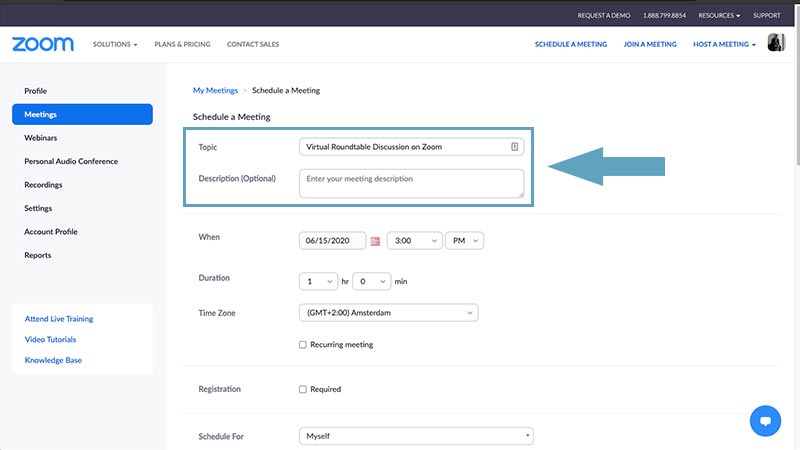
Your roundtable discussion will have a certain topic. I always recommend using the same title as on your landing page where people register for this event.
For example, if the event title on your website is: “Digital Transforming companies through market disruptions”, then enter the same title on Zoom.
3. Select a date and time
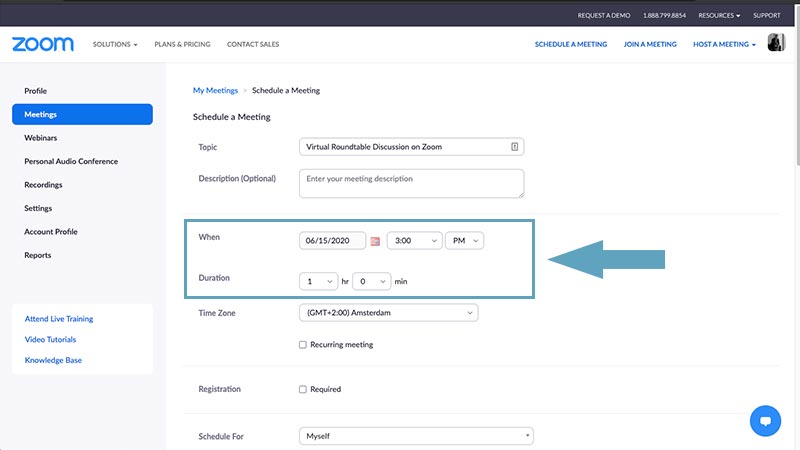
We did the research and the ideal duration of a virtual roundtable discussion is between 60 and 90 minutes.
Any longer, and it will be hard to keep the audience engaged. Additionally, you typically invite decision-maker level people to these types of virtual events. They have busy schedules and it’s easier for them to clear 60 minutes in their schedule rather than 120 minutes.
4. Check the box “Registration Required”
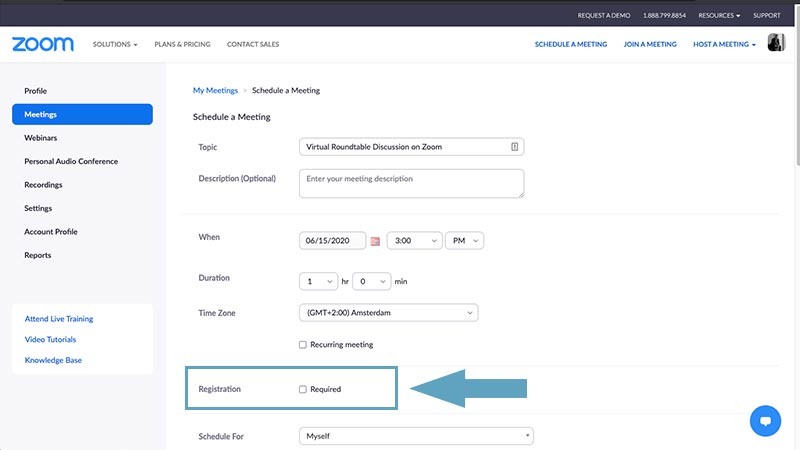
This means that people have to fill in their details to attend your event. This is important because you want to know who attended your event and who didn’t.
If you leave this unchecked, then anyone can enter your event. Virtual roundtable discussions are exclusive and you only want approved people to enter the session. So, always check this box.
5. Generate Meeting ID Automatically
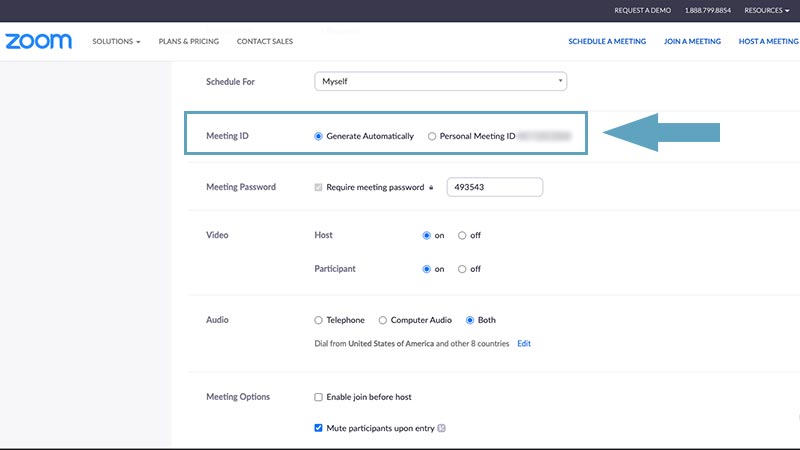
You want to generate the meeting ID automatically. This means that you will create a unique ID for this event. Don’t use your personal room for external meetings, otherwise, everyone will know your ID and then they can potentially hijack your meetings.
6. Leave the meeting password as is
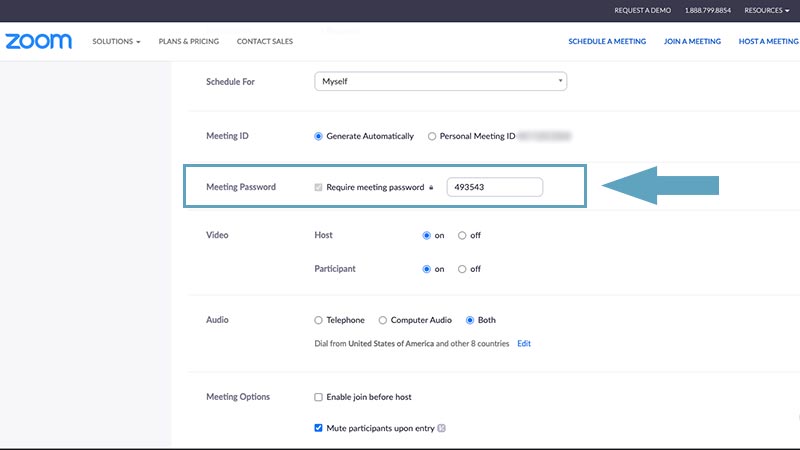
You don’t need to change the meeting password. You can leave it as is. However, it’s completely up to you if you want to create a different password for this meeting.
7. Enable video for participants and Host
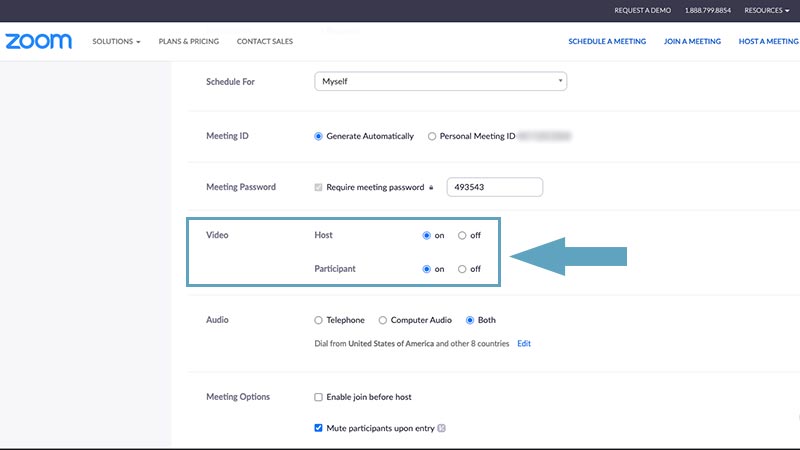
Enabling video improves the ability to build meaningful relationships with your audience. In virtual environments, this is key to making your events successful.
8. Disable “join before the host”
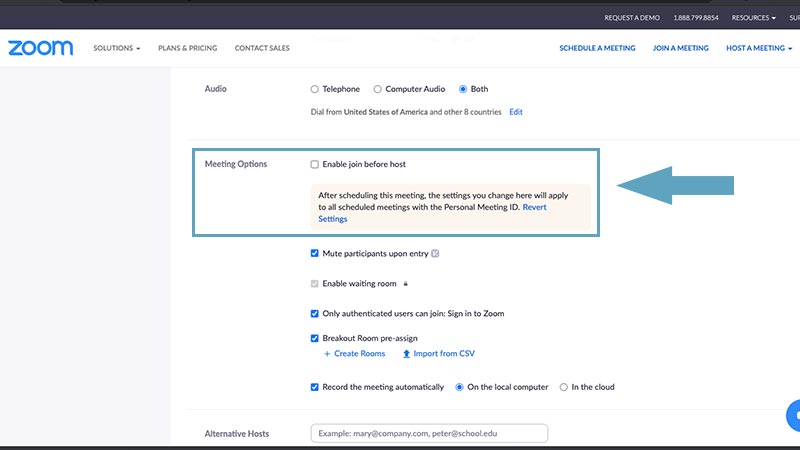
You don’t want people to be in the event before you. As a host, you need to be the first person in the event.
By being the first person in the event, you can welcome people and change some event settings if you have to.
Furthermore, if some of your attendees are in the event before you, it might create some awkward situations for your attendees.
9. Select “only authenticated users can join”
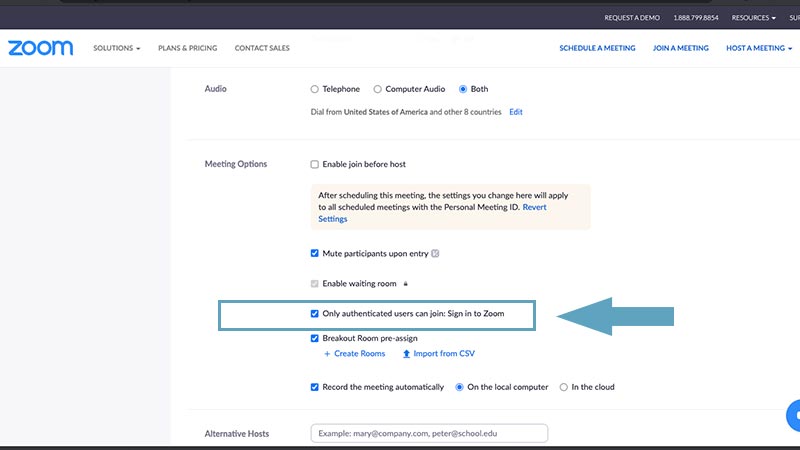
This option just makes sure that the people that you’ve approved are able to join the event.
You don’t want people to join the event without your approval.
10. Breakout room pre-assign (optional)
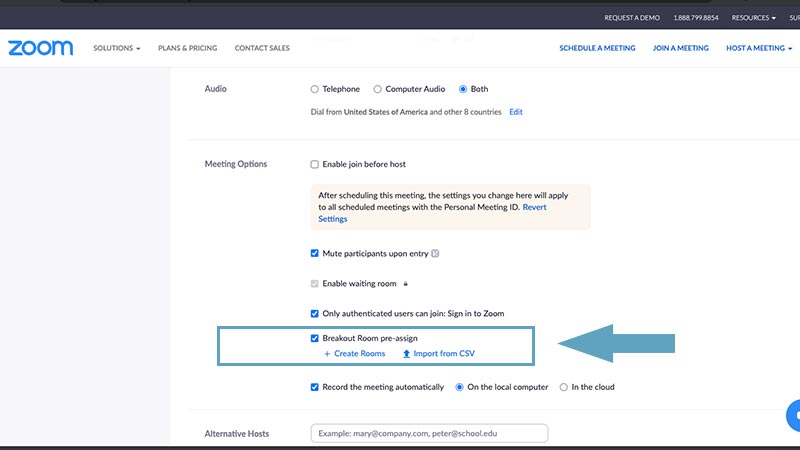
The use of breakout rooms is optional and it really depends on what you want to achieve in your virtual roundtable discussion.
Typically, I don’t use breakout rooms for roundtable discussions below 10 people. This is because we use experienced moderators who can include everyone into the conversations. However, with a large audience size, this gets more difficult and we will use breakout rooms for that.
However, if you are going to use breakout rooms, it’s crucial to assign people to breakout rooms before the event.
During the event, you don’t want to lose any time with assigning people to breakout rooms. You need to provide a smooth experience for your attendees, so always assign people to breakout rooms before the event.
11. Create breakout rooms
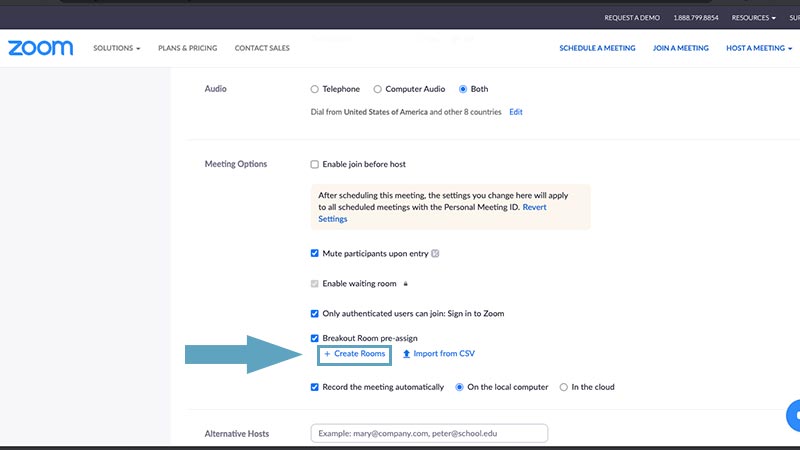
To create a breakout room, click on “Create Rooms”.
12. Name your breakout rooms
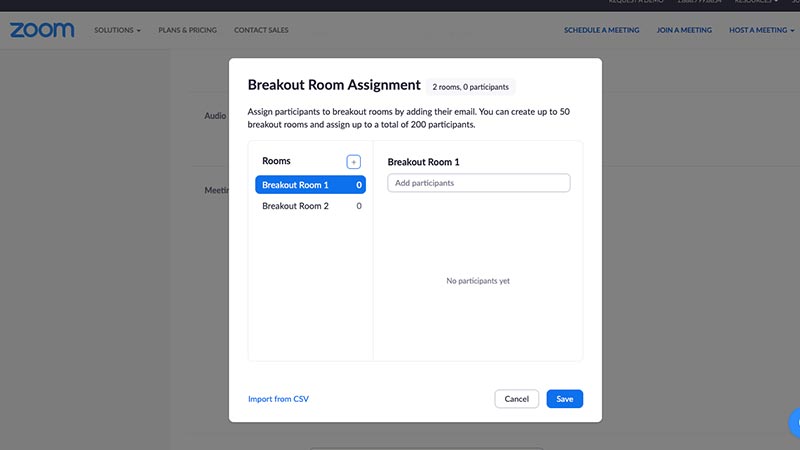
Name your breakout rooms creatively. Don’t use the standard breakout room names.
When we create breakout rooms, we essentially create teams. So the name of your breakout room will represent the team names.
13. Add participants to breakout rooms
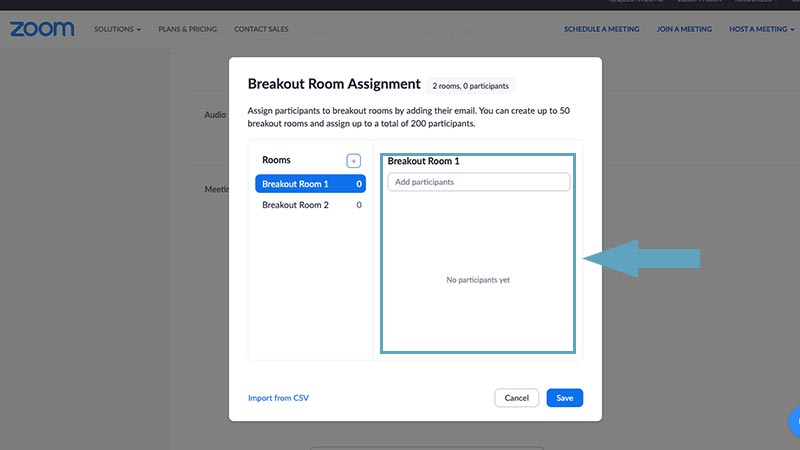
You can add participants to the breakout rooms by email address.
When you’re done, click on “Save”.
14. Record the meeting automatically
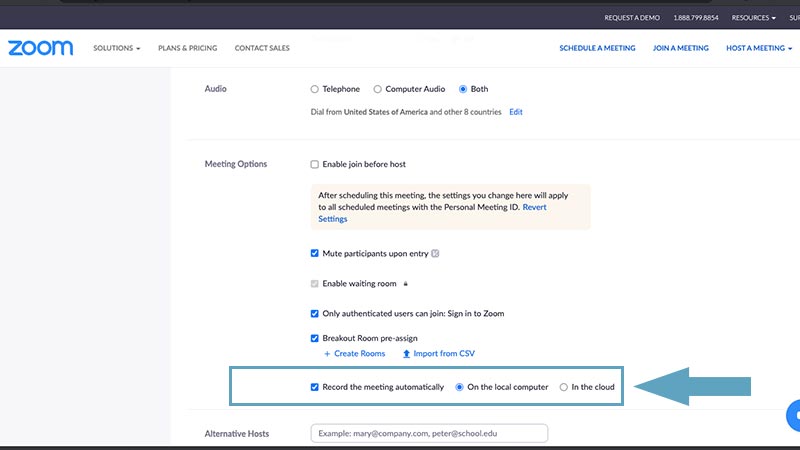
You want to record the session so that you can share the recording with the participants. This is extra value for them and generally, people don’t have an issue with this.
However, at roundtable discussions, people might discuss sensitive topics. So always ask permission of your audience to use the session recordings for anything other than sending it to them.
15. Select Alternative hosts
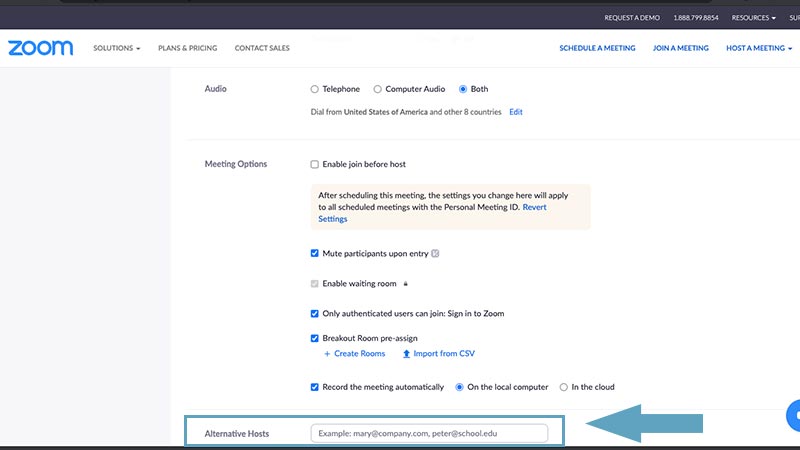
You always want to select a few alternative hosts. If you are on holiday or sick, or something happens, you want that someone else can take control of the meeting.
16. Click on “Save”

To create your virtual roundtable event, click on "save".
17. Add polling questions
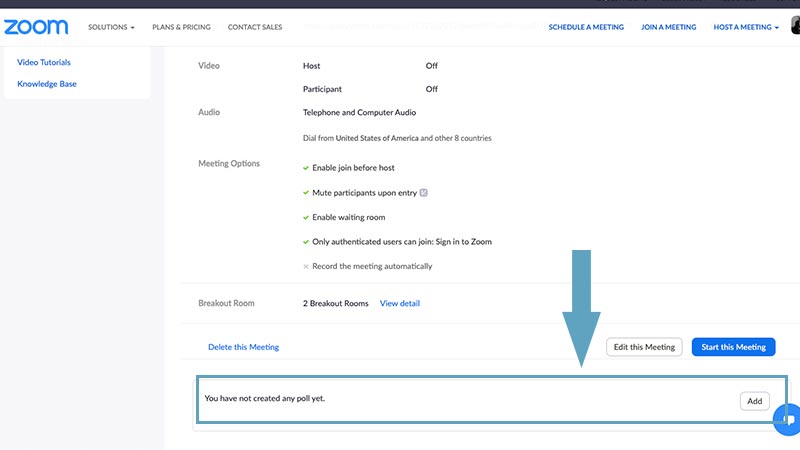
It’s always a good idea to add polls when hosting virtual events. It’s a great way to get the input of the audience and it improves event engagement.
In your newly created event, scroll down to the polling section.
So go ahead and add some polling questions and click on “Save”.
That’s it! It’s quite easy to use Zoom as your virtual roundtable platform.
Now I'd like to hear from you: what other platforms do you use for virtual roundtable discussions? Let me know down in the comments section.
The next step is promoting your virtual roundtable discussion. I've written an article about this so that you can promote your virtual events effectively and make them more successful.
Extra resource:
Share this article


Really well done post, thank you for sharing, great tips!
Thanks Ward! Appreciate it.
Very helpful! Thanks!