How to Send RSS Campaigns using Mailerlite
Table of Contents
You’ve published a new article and you want to share this with your audience as fast as possible. So, you dive into Mailerlite and manually create a new campaign and email to send to your audience.
If you’re publishing one article per week, this is fine. However, if you’re publishing multiple articles per week, this can become a time-consuming activity fast. Time that you could spend on other things to create value for your business.
So here’s the good news. You can send automated emails to your audience whenever you publish a new article on your website. This is achieved by setting up RSS campaigns on Mailerlite!
So in this article, I will show you the step-by-step guide on how to send automated emails through RSS campaigns on Mailerlite. As WordPress has a market share of 40%, I will show you how to achieve this using WordPress.
If you are new to Mailerlite, check out our review here. It’s one of our favorite email marketing software.
What is an RSS feed?
A Really Simple Syndication (RSS) feed allows applications to read updates to websites in a standardized format. The RSS feed will show applications updates to the page title, content, and featured images.
Applications such as Mailerlite are able to develop features based on RSS feeds because the information inside an RSS feed is always structured in the same way across websites. Mailerlite is able to detect updates to your articles and extract information that you can use in your emails.
Steps to Setting up an RSS Campaign on Mailerlite
Enough talking! Let’s dive into the step-by-step guide on how to set up an RSS campaign on Mailerlite.
1. Create a Mailerlite account or log in
The first step is to create a Mailerlite account. If you just want to test the waters first, simply sign up for a trial account.
Once you’ve created your account, you will see your account dashboard.
2. Create a new campaign
Create a new campaign by clicking on Create campaign.

3. Select the “RSS Campaign” type
You are now presented with 4 campaign types.
- Regular campaign;
- A/B split campaign;
- Auto resend;
- RSS campaign;
Click on RSS campaign.

4. Configure the basic settings
Now you need to configure the basic settings of your RSS campaign. This includes setting up your:
- Campaign name;
- RSS feed URL;
- Subject;
- Who is it from?;
- And language.
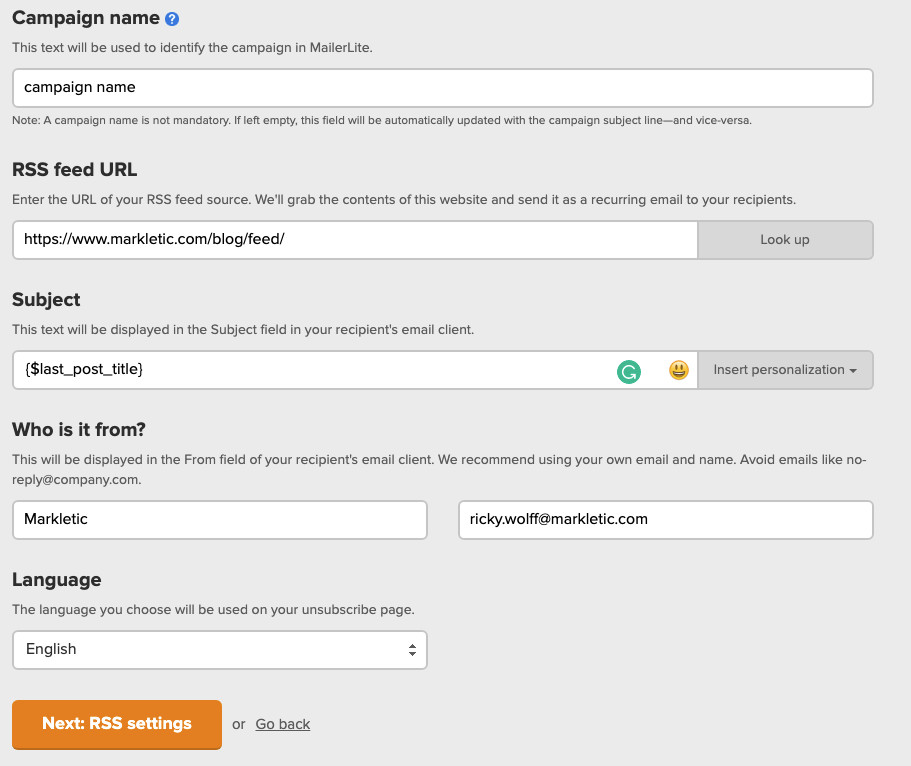
Campaign name
Enter any name you like. This is purely internal and it’s not something that your audience will see.
RSS feed URL
On WordPress websites, you can find your RSS feed URL by appending /feed to your URL.
For example, here on Markletic, the RSS feed URL would look like this: https://www.markletic.com/blog/feed/
This is our main archive page and it would capture any new post published to Markletic. However, let’s say you're setting up an RSS campaign for a specific post category. Naturally, you would only want to trigger the RSS campaign when new posts are added to that specific category.
You can achieve this by navigating to your category archive pages and appending /feed to the URL.
For example, we have a category archive of email marketing software reviews. This archive page shows any new email marketing software review that we publish to Markletic.
The RSS feed URL looks like this: https://www.markletic.com/review-category/email-marketing-software/feed/
Subject
Here you can configure the subject of your email campaign. I always use my last blog title as the email subject.
If you want to do this as well, simply click on Insert personalization and select last post title.
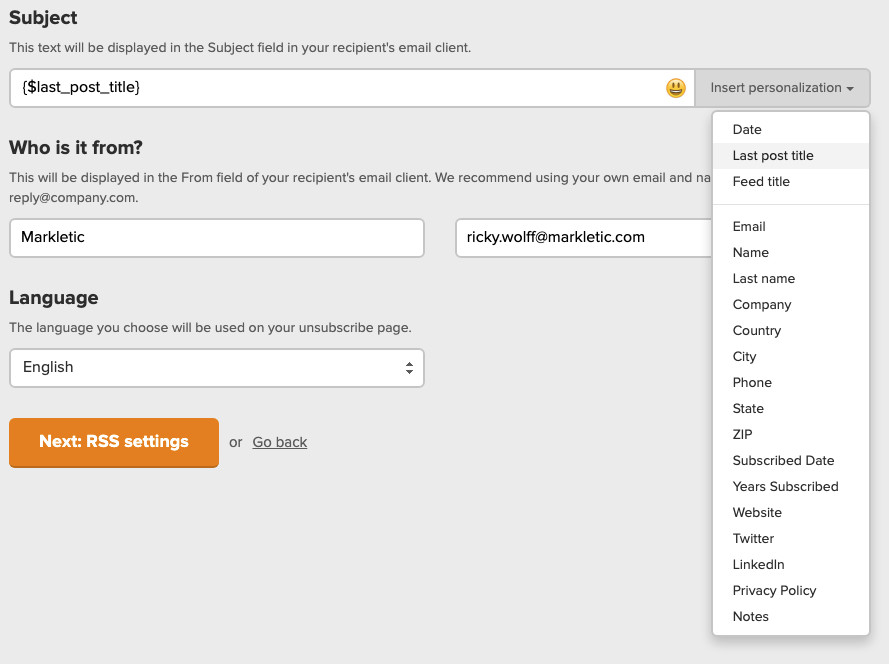
When you’re done configuring these settings, proceed by clicking on Next: RSS settings.
5. Configure RSS Settings
At the RSS settings page, you can configure how often you want to send your emails. This will highly depend on how frequently you publish articles on your website. Below is an example of my settings.
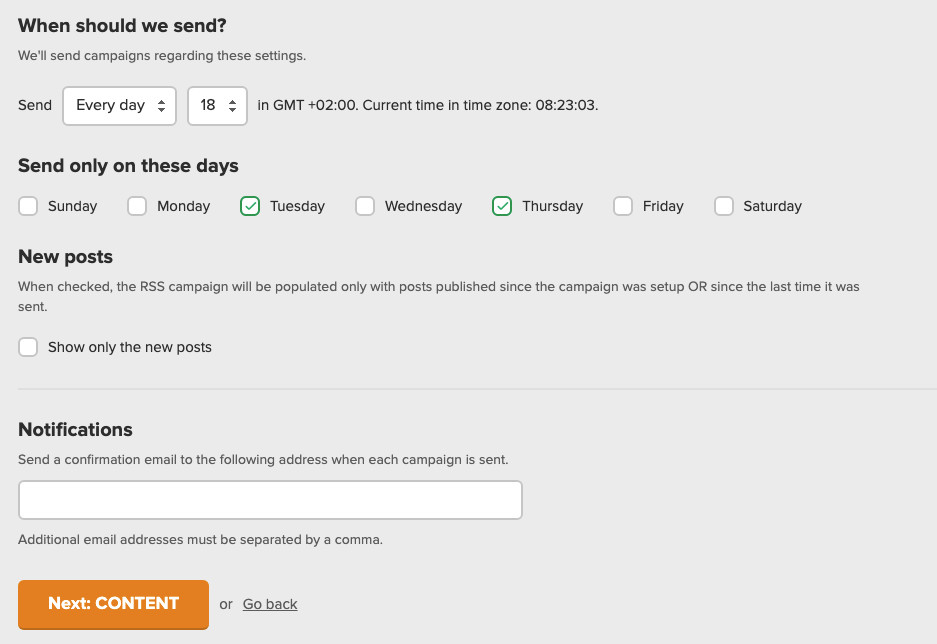
Proceed by clicking on Next: Content.
6. Develop your email content
Now it’s time to develop your emails. For this, you can use any template that you would like. If you don’t have templates, consider looking at the template gallery.
Start by selecting one of your templates.
To send RSS campaigns through Mailerlite, you need to use the RSS blocks that Mailerlite has developed.
On the left navigation panel, click on the top dropdown and then select RSS.
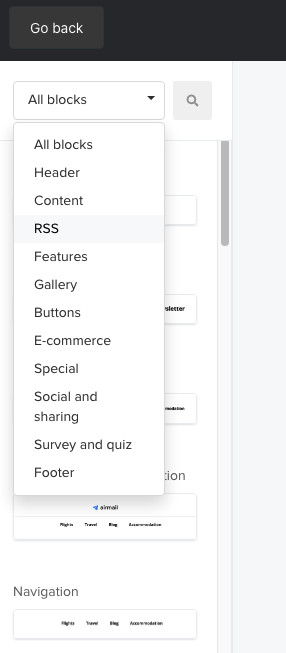
Now you have filtered the list of blocks to only show the RSS blocks. You will be presented with the following blocks.
- RSS list;
- RSS featured article;
- RSS with signature.
Select the block of your preference and drag it into your email. Your email will look something like this.
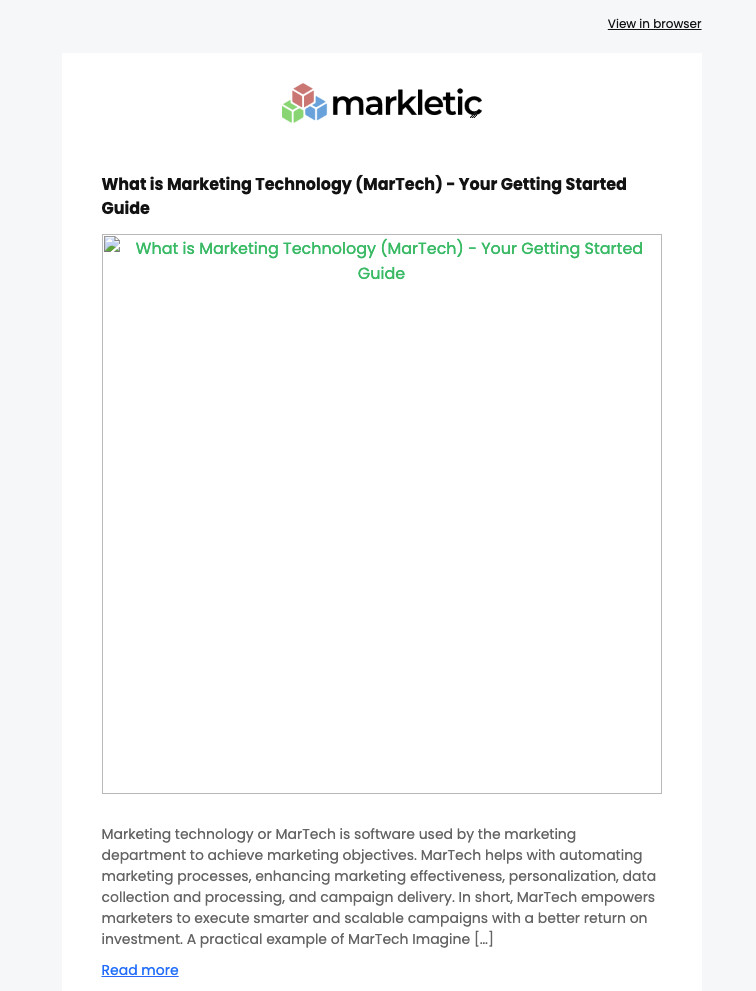
You will see that it’s not showing the featured images. This is because WordPress doesn’t add the featured images to your RSS feeds by default. If you want your RSS email campaigns to show a featured image, take a look at step 7. If you don’t want to use featured images, you can proceed to step 8.
7. Add code to WordPress to display featured images
To display featured images in your RSS email campaigns, you will need to add some custom code to your WordPress installation. Don’t worry, this is very simple to achieve.
There are two ways to add custom code to your website.
- Add code to your functions.php file;
- Add code by using a plugin.
My preference goes out to using a plugin and it’s what we will cover in this tutorial.
The code that you need to add to your website is displayed below.
add_filter( 'the_content', 'featured_image_in_feed' );
function featured_image_in_feed( $content ) {
    global $post;
    if( is_feed() ) {
        if ( has_post_thumbnail( $post->ID ) ){
            $output = get_the_post_thumbnail( $post->ID, 'large', array( 'style' => 'float:right; margin:0 0 10px 10px;' ) );
            $content = $output . $content;
        }
    }
    return $content;
}
Proceed by installing the plugin Code Snippets to your WordPress site.
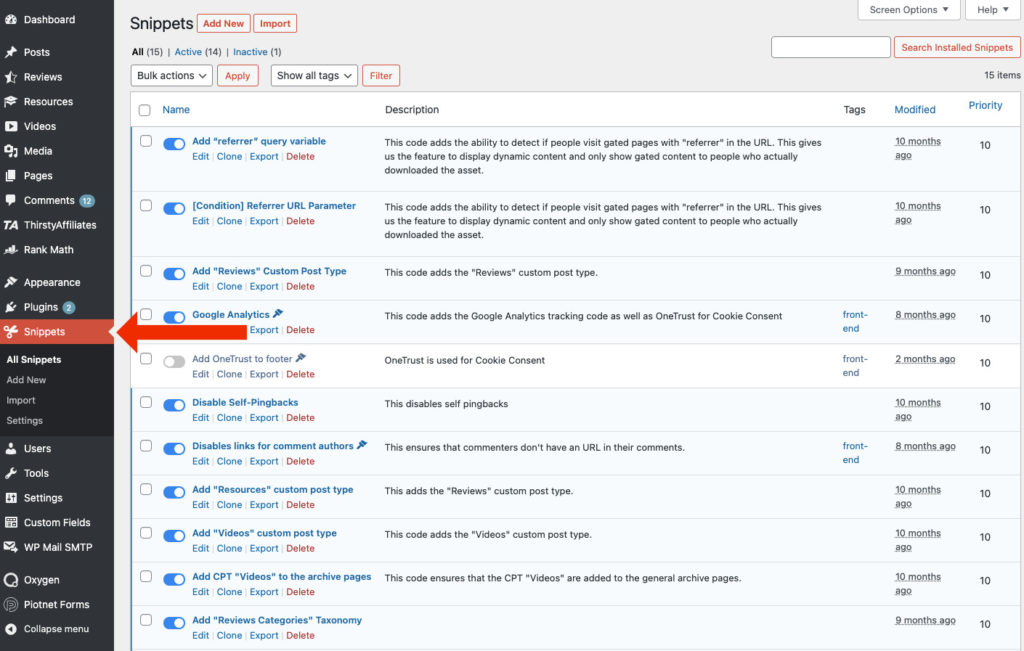
Once you’ve installed and activated the Code Snippets plugin, then go ahead and click on Snippets in the left navigation panel of your WordPress site.
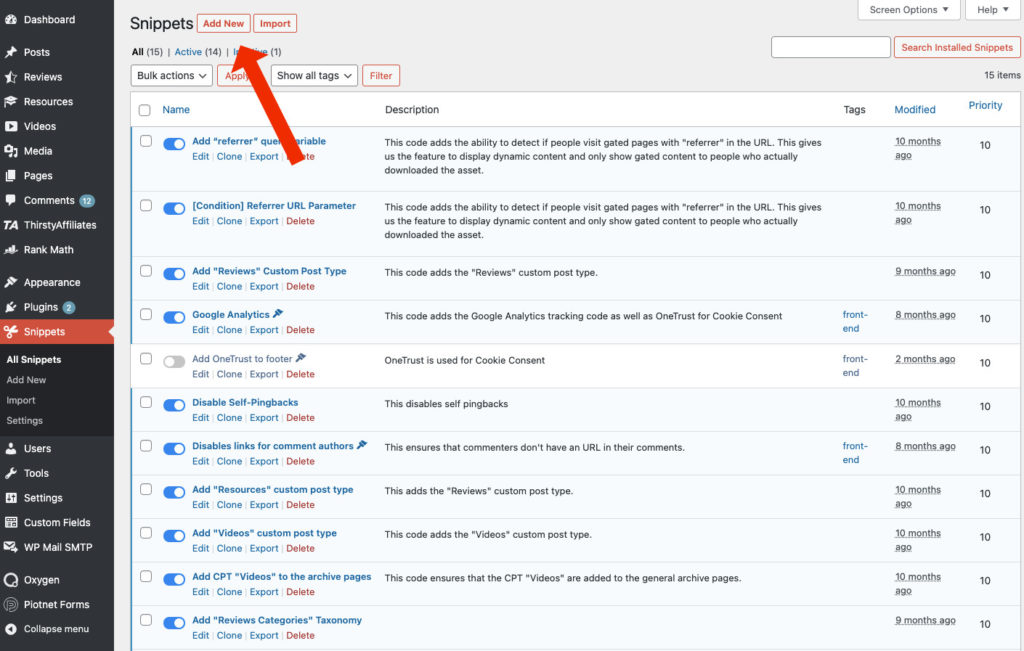
Proceed by clicking on Add New.
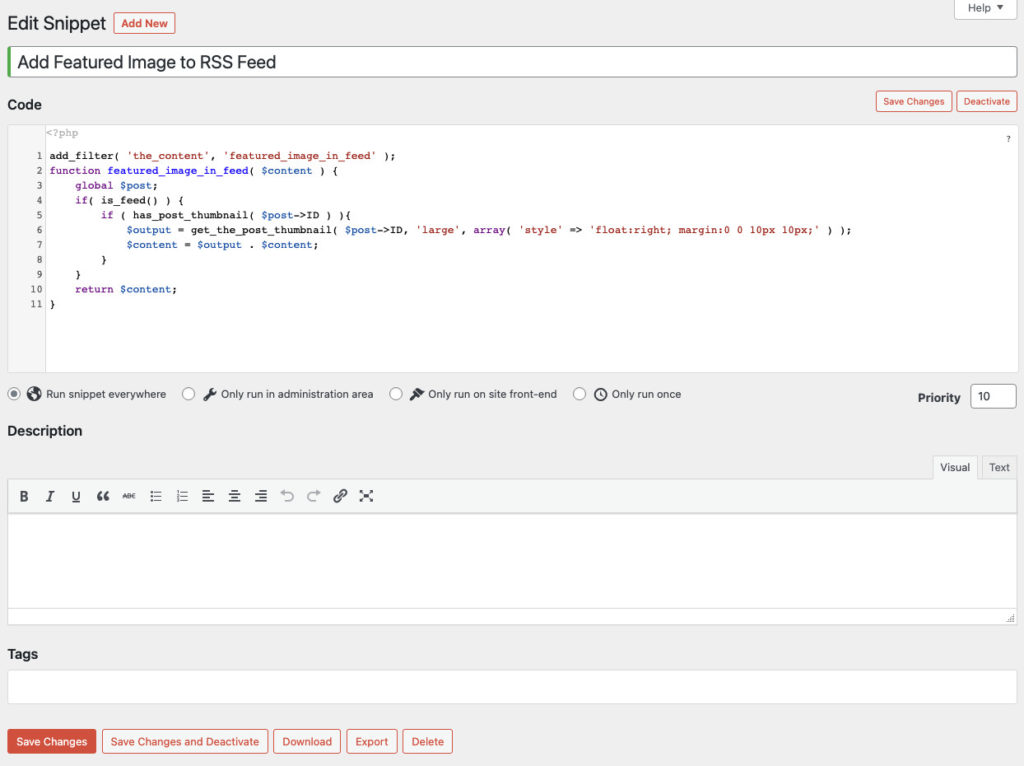
Add a title and paste the code in the field for the code. Select Run snippet everywhere and click on Save Changes.
If you are using a caching plugin, make sure to purge your cache.
Now, when you go back to Mailerlite, you still won’t see the featured images in the editor. However, rest assured that it is working. You can test this by clicking on Preview and test.
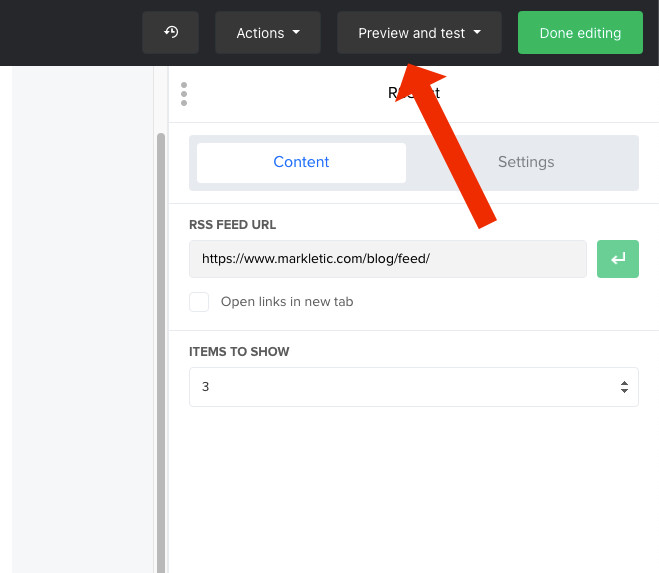
Click on Preview mode and you should see your featured images!

Proceed by clicking on Done Editing.
8. Select recipients of your RSS Campaign
Here you can select the intended audience of your newly configured RSS campaign. Simply select your audience and click on Next: Review and confirm.
Review your settings and click on Next: schedule.
9. Schedule your RSS Campaign
This is the last step of setting up your RSS campaign! The last option you can configure here is if you want to track the campaign using Google Analytics. I recommend always selecting this option.
So, select Use Google Analytics link tracking to track clicks from your campaign.
Proceed by clicking on Send and that’s it! You have now configured your first RSS campaign using Mailerlite!
If you want to learn more about Mailerlite, then check out our in-depth review here.
Share this article


